
A lead generation form has one job: turn a visitor into someone you can call back, with enough detail to give them a real answer. Most contact forms only get the first half right. They collect a name and an email, then leave you chasing basic questions by phone.
In this guide we’ll build a WordPress lead generation form for a landscaping company that asks the right questions, adapts to each customer, saves every lead, emails your team and thanks the customer automatically. We’ll use Custom Contact Forms, the free form plugin we make, and everything shown here is in the free version.
Table of Contents
What makes a good lead generation form
Before building anything, it helps to know what you’re aiming for. A good lead form:
- Asks only what you need to reply. Every extra field is one more reason to give up. Ask for what you need to quote or call back, and nothing else.
- Qualifies the lead. A couple of questions about the service, timeline and budget tell you who to call first and what to prepare.
- Adapts to the person filling it in. A homeowner and a business manager need different questions. Conditional logic shows each one only what applies to them.
- Never loses a lead. Every entry is saved, even if a notification email goes missing.
- Sets expectations. An instant thank-you saying when you’ll reply keeps people from contacting a competitor while they wait.
Step 1: Start from the Quote Request template
Install Custom Contact Forms from Plugins → Add New, then go to Forms → Templates and pick Quote Request. It gives you name, email, phone, a service dropdown, a budget question, a project details box and a file upload, which is most of a lead form already.
For our landscaping example, we adjusted it to ask:
- Name, email and phone (phone optional, so nobody is put off)
- Property type: Home or Business
- Services needed: lawn care, landscape design, tree trimming, seasonal cleanup
- When do you need it? As soon as possible, within a month, or just planning
- Budget, in three simple ranges
- Photos of the property (optional), so you can price the job before visiting
- Anything else we should know?
The timeline question is worth keeping on any lead form. “As soon as possible” leads go to the top of your call list, while “just planning” leads are a good fit for a follow-up email.
Step 2: Ask business customers their own questions
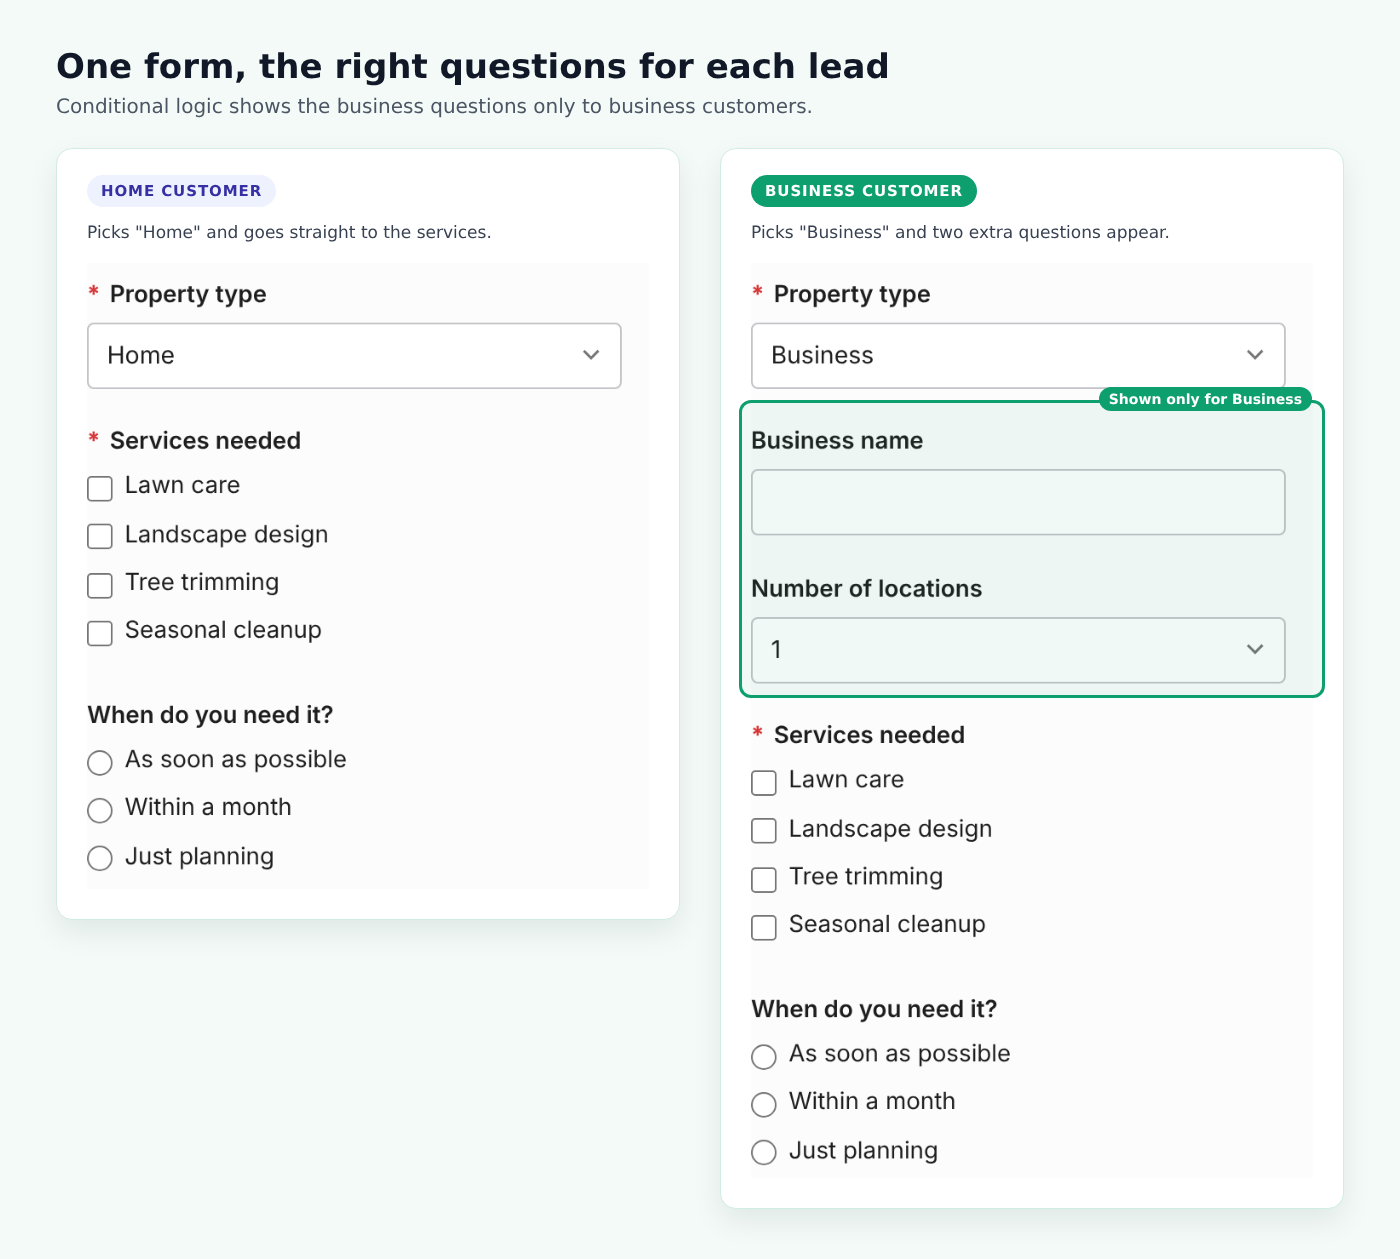
Homeowners don’t need to tell you their business name or how many locations they have. Instead of making the form longer for everyone, we used conditional logic: the “Business name” and “Number of locations” fields only appear when someone picks Business.
To set it up, open the form, click the field you want to show or hide, and open Advanced. Turn on Enable Conditional Logic, choose Show this field if All of these conditions are true, then pick the Property type field, is, and type Business.
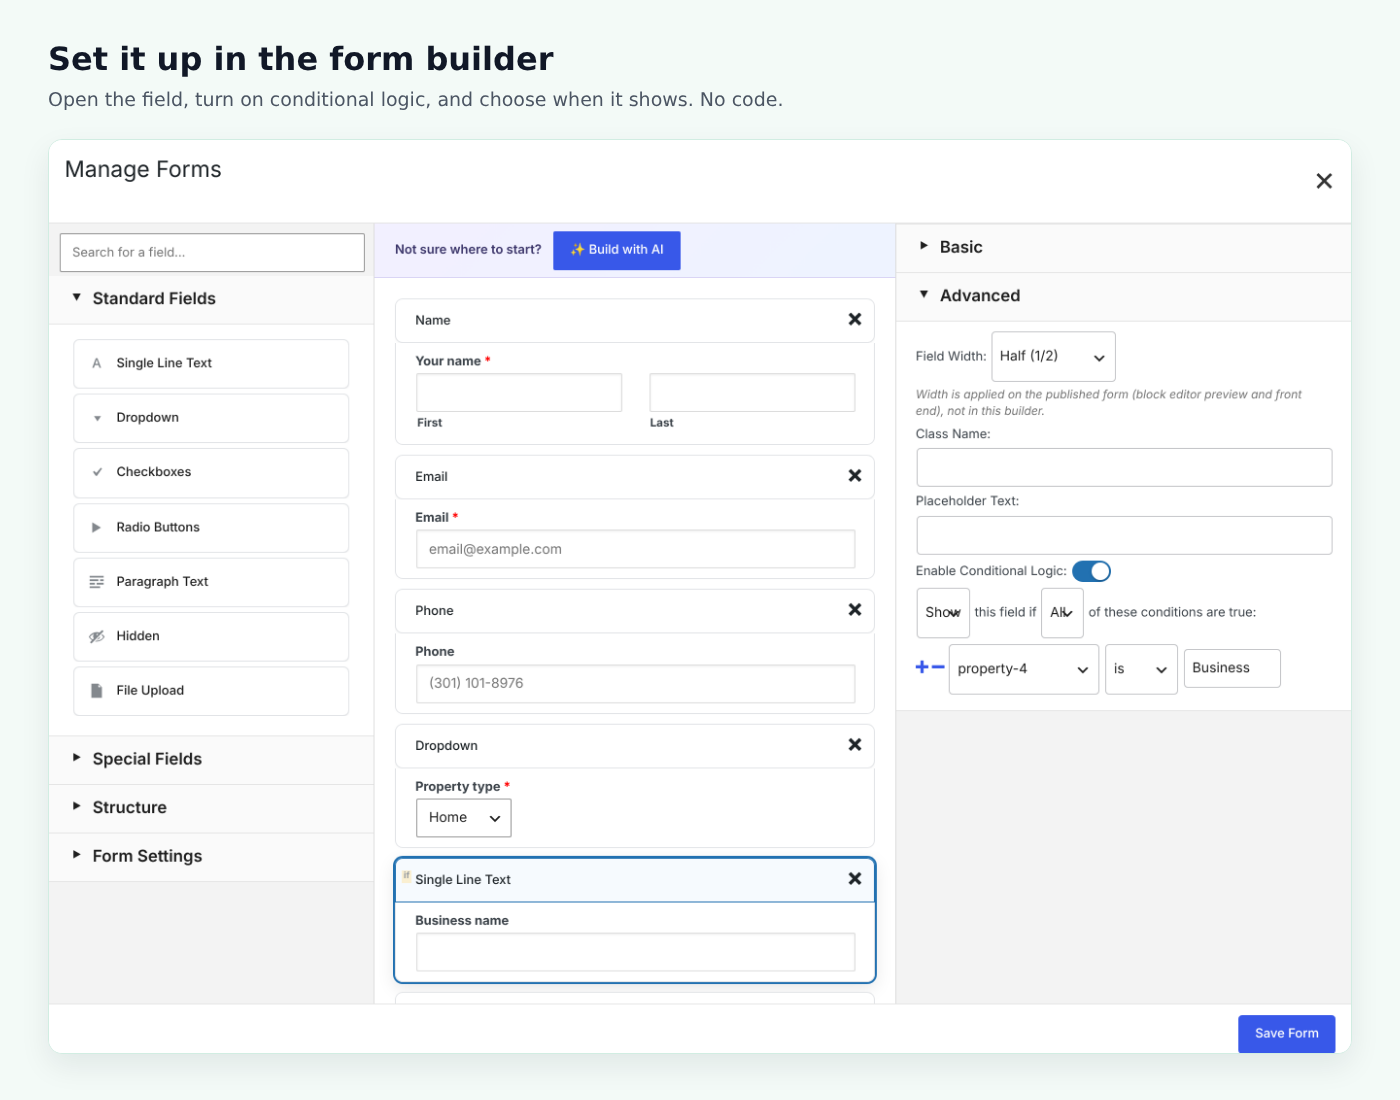
Hidden fields are skipped when the form is checked, so a required business question never blocks a homeowner. For more ideas, see our guide to WordPress form conditional logic.
Step 3: Email your team and thank the customer
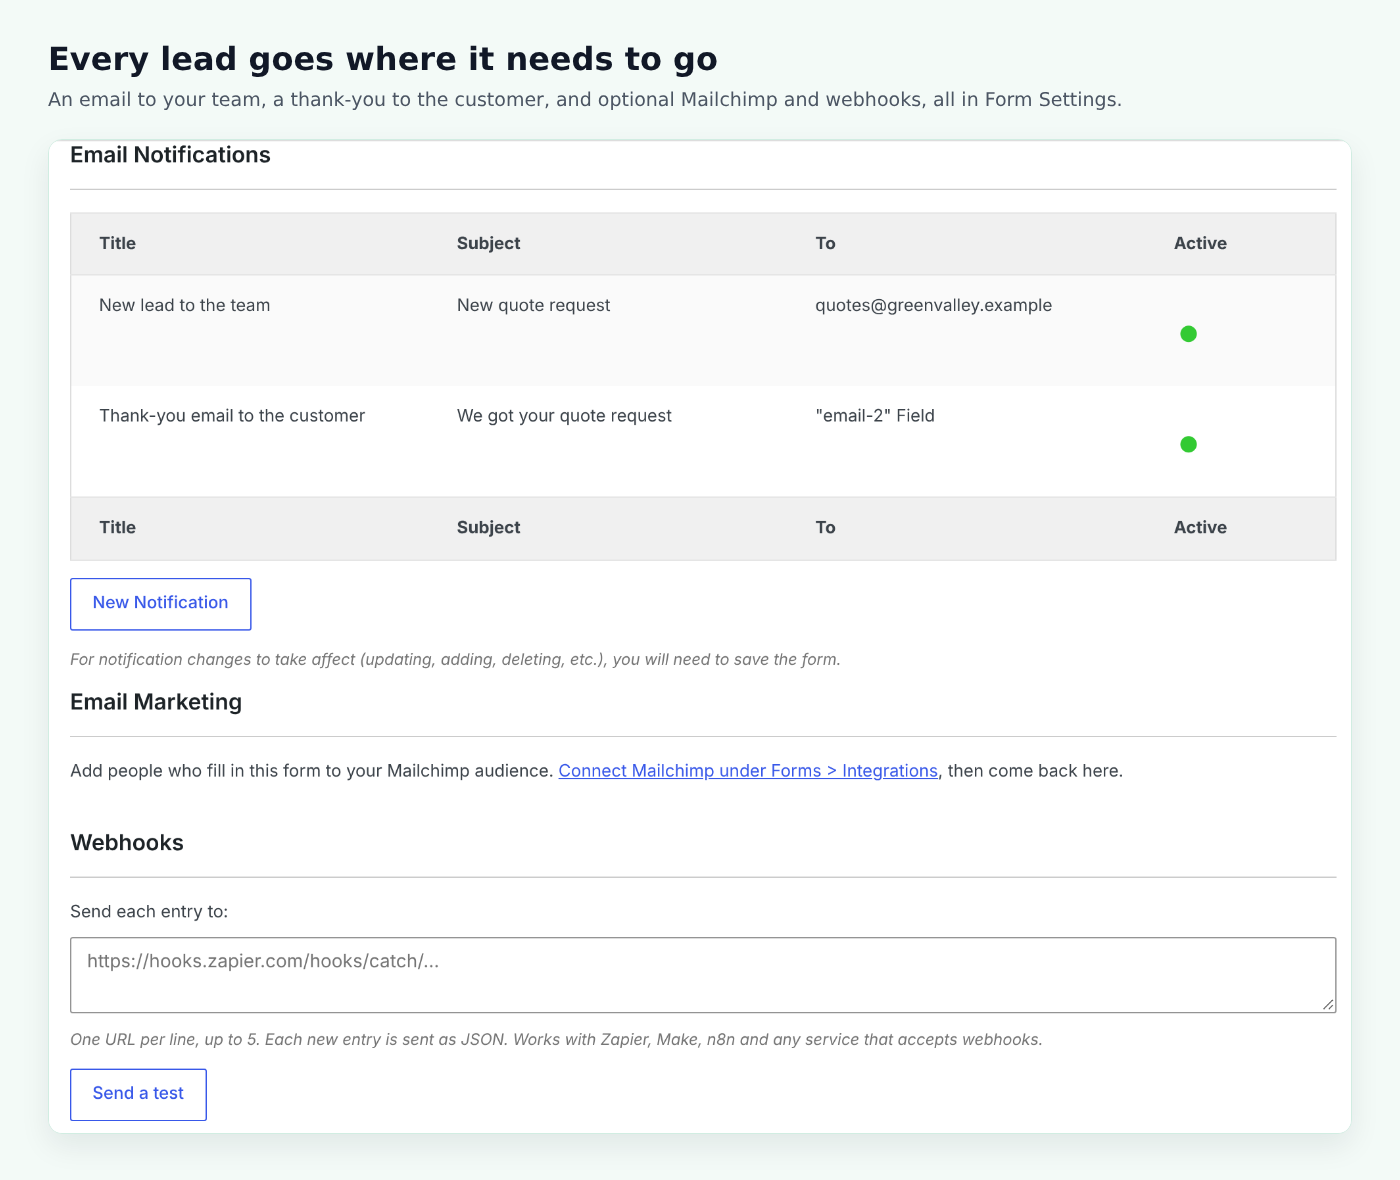
A lead form should send two emails. Under Form Settings → Email Notifications, each form can have as many notifications as you need:
- New lead to the team: sent to your sales or office address, with every answer included. Set Reply-To to the customer’s email field, so hitting Reply goes straight to them.
- Thank-you to the customer: sent to the email address they entered, saying when they’ll hear from you. Add
[all_fields]to the message so they have a copy of what they sent.
If your notification emails don’t arrive reliably, your entries are still saved. Our guide to fixing a WordPress contact form not sending email walks through the usual causes.
Step 4: Send leads to your email list or CRM
Leads who aren’t ready yet are still worth keeping in touch with. Two free options sit right below the notifications:
- Mailchimp: connect it once under Forms → Integrations, then choose an audience for this form. Add a checkbox like “Send me seasonal lawn tips and offers” and pick it under Only add people who tick, so only people who agreed are added. Double opt-in is on by default.
- Webhooks: paste a Zapier, Make or n8n URL to send every new lead to your CRM, a Google Sheet or a Slack channel. Click Send a test so the tool can see your fields.
Using ActiveCampaign, Brevo, Kit, MailerLite or MailPoet instead of Mailchimp? Those connect the same way with Custom Contact Forms Pro.
Step 5: Keep spam out of your leads
A lead form on a public page will attract spam bots. Custom Contact Forms already includes a honeypot, a time trap and rate limiting. For extra protection, turn on Cloudflare Turnstile under Forms → Integrations. It stops bots without making real customers solve puzzles. Our WordPress form spam protection guide compares the options.
Step 6: Add the form to a page and track results
Add the form to your quote page with the Contact Form (CCF) block or its shortcode, such as . Then watch two places:
- The form’s entries: every lead with all their answers, ready to export to CSV.
- The Forms dashboard: entries, form views and conversion rate for any date range. A weekly summary email brings the same numbers to your inbox.
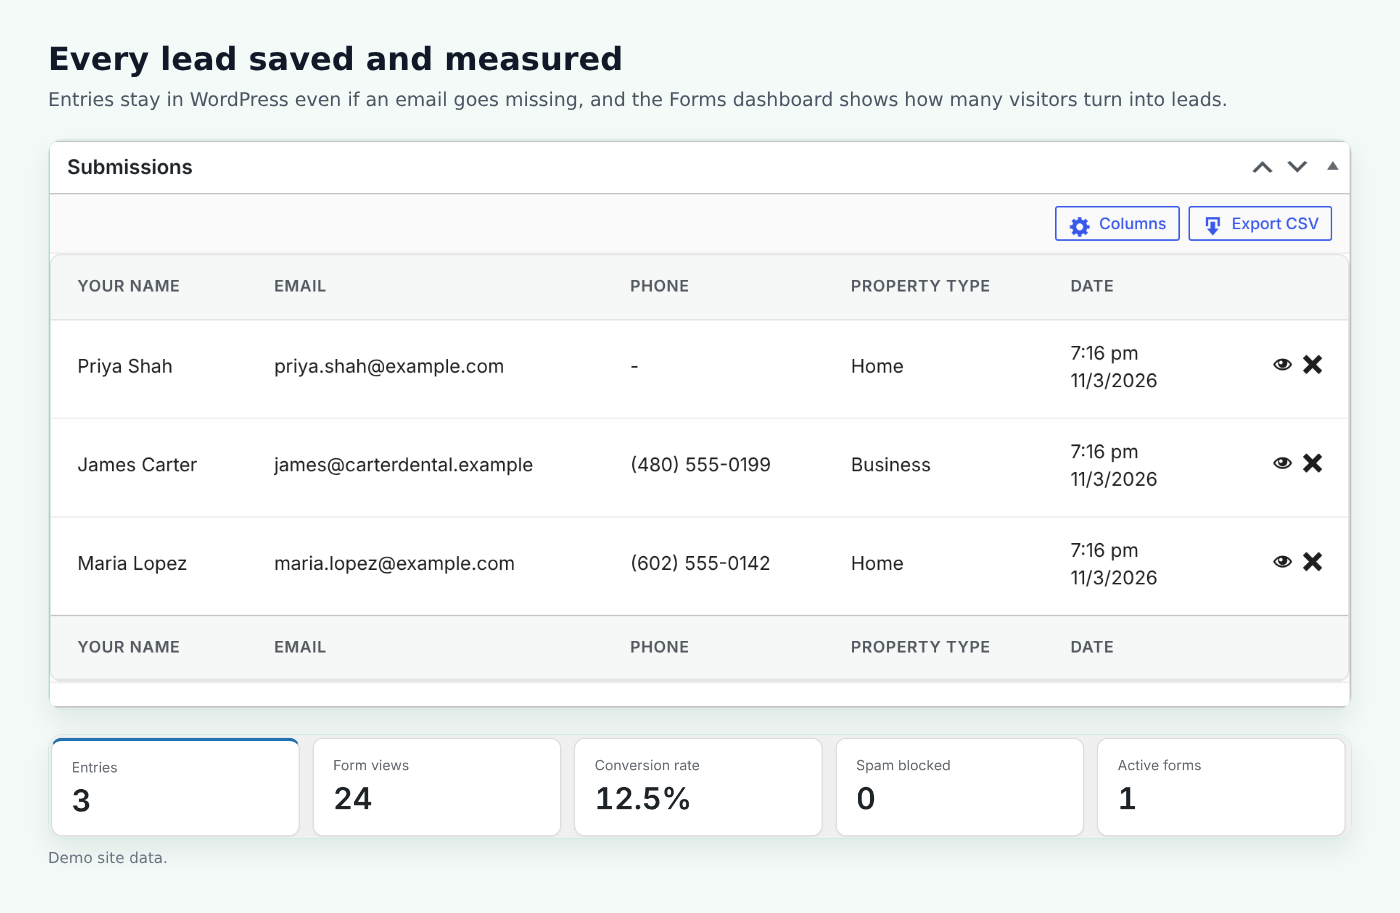
The conversion rate is the number to watch when you change the form. If you remove a question or reword the button, check whether more visitors go on to send it.
Tips to get more leads from your form
- Use a specific button. “Get My Free Quote” tells people what happens next. “Submit” doesn’t.
- Promise a response time and keep it. Put it in the form description and the thank-you email.
- Make optional fields clearly optional. Phone numbers and photos help, but forcing them costs leads.
- Put the form where people decide. On your services and pricing pages, not only on the contact page.
- Reply to the fastest leads first. Sort by the timeline answer and call the “as soon as possible” leads the same day.
When you need more
Everything above is free. Custom Contact Forms Pro adds tools for businesses that want to go further: multi-step forms that split long forms into short pages, address autocomplete so service addresses are typed correctly, text message confirmations through your own Twilio account, more email marketing services, and deposits or payments on the same form when a lead is ready to book.
Frequently asked questions
What is a lead generation form?
It’s a form that collects a potential customer’s contact details along with the information you need to follow up, such as the service they want, their timeline and their budget.
Can I create a lead generation form in WordPress for free?
Yes. Custom Contact Forms is free on WordPress.org and includes saved entries, conditional logic, multiple email notifications, file uploads, Mailchimp, webhooks, spam protection and a conversion rate dashboard.
How many fields should a lead form have?
As few as you need to reply properly. Contact details plus two or three qualifying questions is usually enough. Conditional logic lets you ask more of the people it applies to without making the form longer for everyone.
Where are my leads saved?
In your WordPress database. Open the form under Forms → Forms and Submissions to see every entry, or export them to CSV.
Can I send leads to my CRM?
Yes. Add a webhook URL from Zapier, Make or n8n in the form’s settings, and each new lead is sent there as it arrives, ready to pass on to your CRM.
Start collecting better leads today. Download Custom Contact Forms free from WordPress.org, start from the Quote Request template, and have your lead form live in minutes.
Free on WordPress.org
Never lose another form entry
Custom Contact Forms saves every entry on your site and includes conditional logic, file uploads, a signature field, Mailchimp, webhooks and spam protection, all free.
Get our new form guides by email
Practical guides on forms, email delivery and spam, plus news when Custom Contact Forms gets new features.
We only use your email to send our guides and news. Unsubscribe anytime. Privacy Policy
